Project: Paint a Sci-Fi Trooper
Paint an armored infantry soldier with crisp armor and clean details
~5 min read
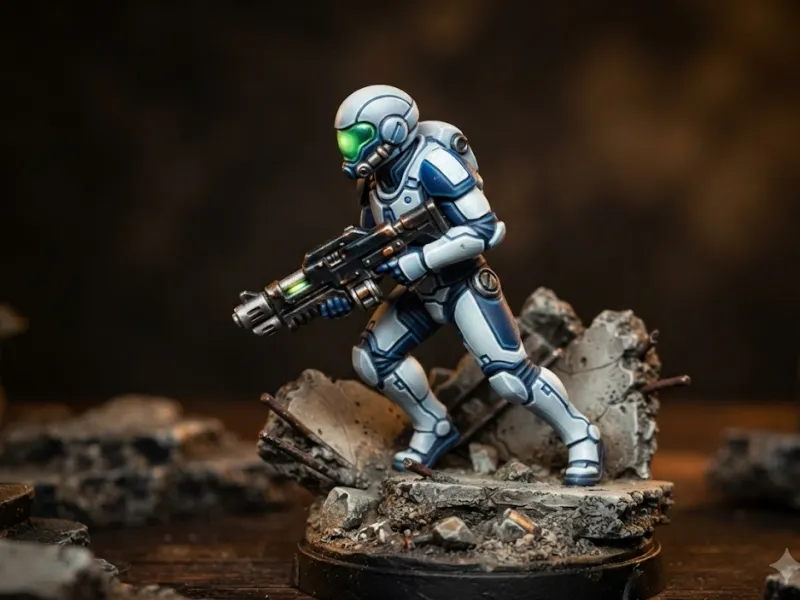
Armored infantry are the backbone of any sci-fi army and a perfect painting project for practicing hard-surface techniques. In this project, you'll paint a generic armored trooper — power-armored, helmed, carrying a rifle. The skills here focus on getting clean, solid armor panels and picking out small details like pouches, lenses, and insignia. These techniques transfer to any hard-armored model.
You'll need: your primed model, a main armor color, a secondary color for cloth and soft areas, a metallic paint for the weapon, a dark wash, a lighter shade of your armor color for edge highlighting, and a bright color for lenses or eye details.
Prime the Model
Apply a thin, even coat of primer. For armored models, black or dark grey primer works well — it naturally shades recesses and any spots you miss will read as shadow rather than bare plastic.
Basecoat the Armor
Choose a bold color for the armor plates — blues, greens, reds, or even stark white all work for sci-fi troopers. Apply two to three thin coats over all the armor panels. Take your time and keep the coats smooth. Armor panels are large, flat surfaces where brushstrokes show easily, so thin paint is especially important here.
Basecoat the Cloth and Soft Areas
Paint the joints, undersuit, tabard, pouches, and any fabric areas with a darker, neutral color — dark grey, black, or dark brown. These areas are usually recessed between armor plates and form a visual contrast with the bright armor.
Paint the Weapon and Metallics
Apply a metallic paint (gunmetal or dark silver) to the rifle, any exposed mechanical parts, and metallic trim. One coat of metallic paint is usually enough for good coverage. If the weapon has a casing, paint that in a matte color (dark grey or black) to contrast with the metallic barrel and mechanisms.
Apply the Wash
Apply a dark wash into the recesses between armor plates, into the joints, over the weapon details, and across the cloth areas. For armor, you can either wash the whole panel (quick) or carefully apply the wash only into the recesses (cleaner but slower). Either approach works — recess shading just requires less cleanup.
Edge Highlight the Armor
Mix a lighter version of your armor color (or use the next lighter shade in your paint range). Using the side of a fine brush, paint thin lines along every sharp edge of the armor plates. Focus on the edges facing upward and outward. This step takes practice, but it's what makes armored models look crisp and defined at tabletop distance.
Pick Out the Details
Paint the helmet lenses with a bright color (red, green, or blue — a single dot of white in the corner sells the "glowing" effect). Pick out any pouches, grenades, or insignia with appropriate colors. Paint the base to match your army's basing scheme. Finish with a black rim.
If your edge highlights are too thick in places, clean them up by painting over the mistake with your base armor color. Edge highlighting is a conversation between the highlight and the base color — go back and forth until the lines look right.
One trooper down — and with practice, you'll be able to batch paint a whole squad. The techniques you just used work on any armored model in any sci-fi setting. Ready to try it with your own paint collection? Generate a custom guide and get color recommendations matched to the paints you own.
Sign in to track your progress